Need to initiate a new case? This guide provides general instructions applicable across all states where our services are available. While we’ll illustrate the process using an example from a California eFileCA court, the steps outlined are broadly relevant.
If you would like a state-specific example, you may select one of the states below.
California Georgia Illinois Indiana Maryland Nevada Texas Virginia
Initiate a New Case
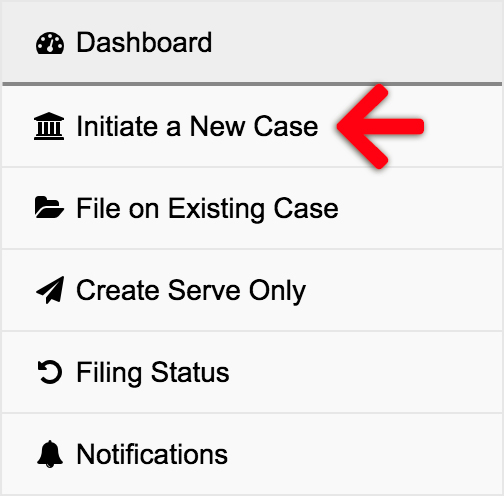
Click the Initiate a New Case link from the left menu of the Dashboard to begin:

1. Select Court & Case Type – Choose the court location and case type to file your new case.

2. Add Documents – Define, select, and upload the documents that make up your filing.

- Document Type – The list of available Document Types within the e-filing system is determined and maintained by the court. If you cannot find an exact match for your document, you should select the closest generic document type option that seems most appropriate.
- Document Description – After you have selected a document type, you will typically have a “Document Description” field. In this field, you should enter the exact and complete title of the document you are filing.
- Click to Upload – Click the link to add your document. Our system will automatically convert most native file formats (i.e. Word, WordPerfect, JPG, PNG, GIF, TIF) into the Court’s preferred Adobe PDF format upon upload. Direct uploads of Word documents (.doc or .docx) are limited to specific document types that courts explicitly require in Word format, such as certain proposed orders.
- Edit – Click the “Edit” button to edit a description, delete a document, or replace a document.
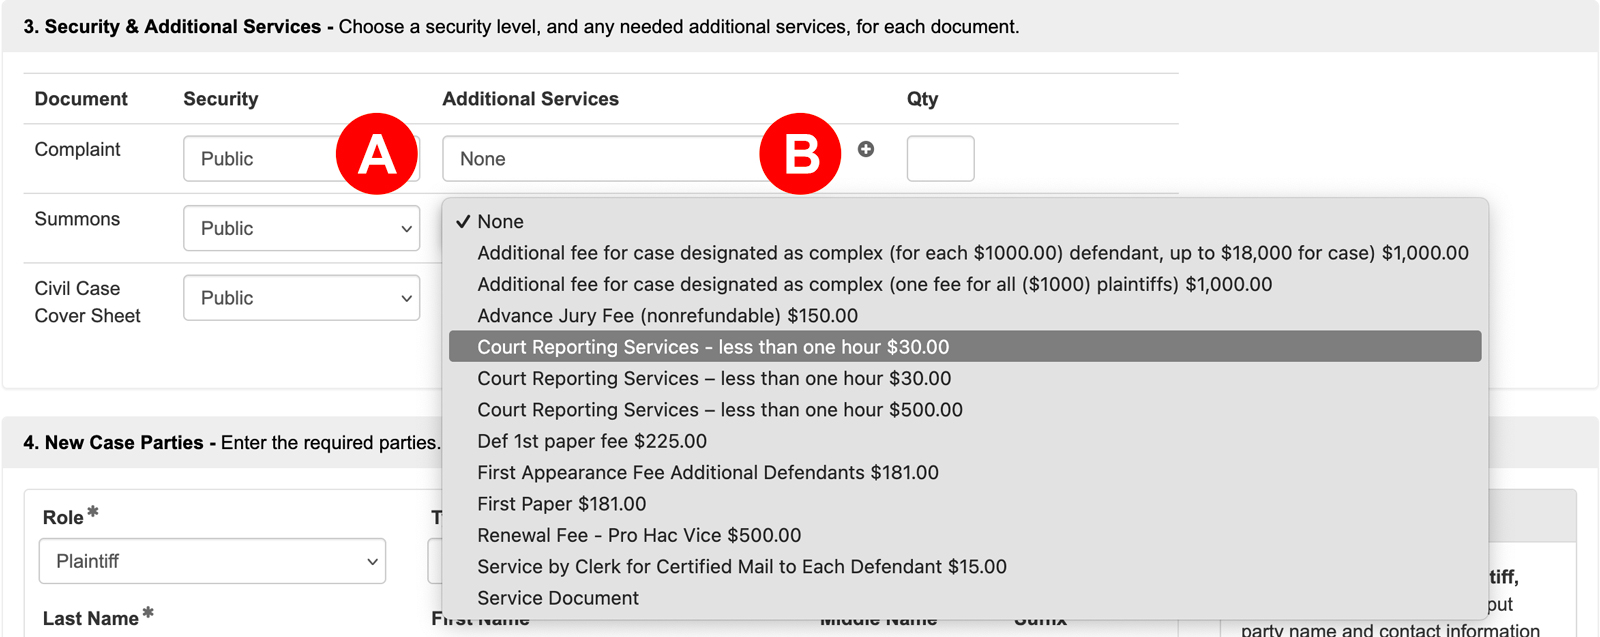
3. Security & Additional Services – Choose a security level, and any needed additional services, for each document.

- Security – Most times your choices are public or confidential, but those choices will vary from court to court, and from document type to document type. You will need to pick something from the choices presented to you. While many people choose the public option, others choose confidential if there is sensitive information they do not think should be public.
If a filer sets a document’s security to confidential AND they do not want anyone served those documents, filers will NOT want to electronically serve any party. Electronic service sends ALL of the documents in a filing to ALL selected parties regardless of the document security type chosen. - Additional Services – When you initiate a new case or file on an existing case, you have the choice of adding additional services for the document(s) you are filing. This can be for extra fees or services like the court reporter fee or first paper fee, or for extra things like ordering certified copies (if the court offers it). There are many different choices that can appear here, so always be sure to check it before submitting a filing. You can also add a Qty to these additional services if you need multiples of something.
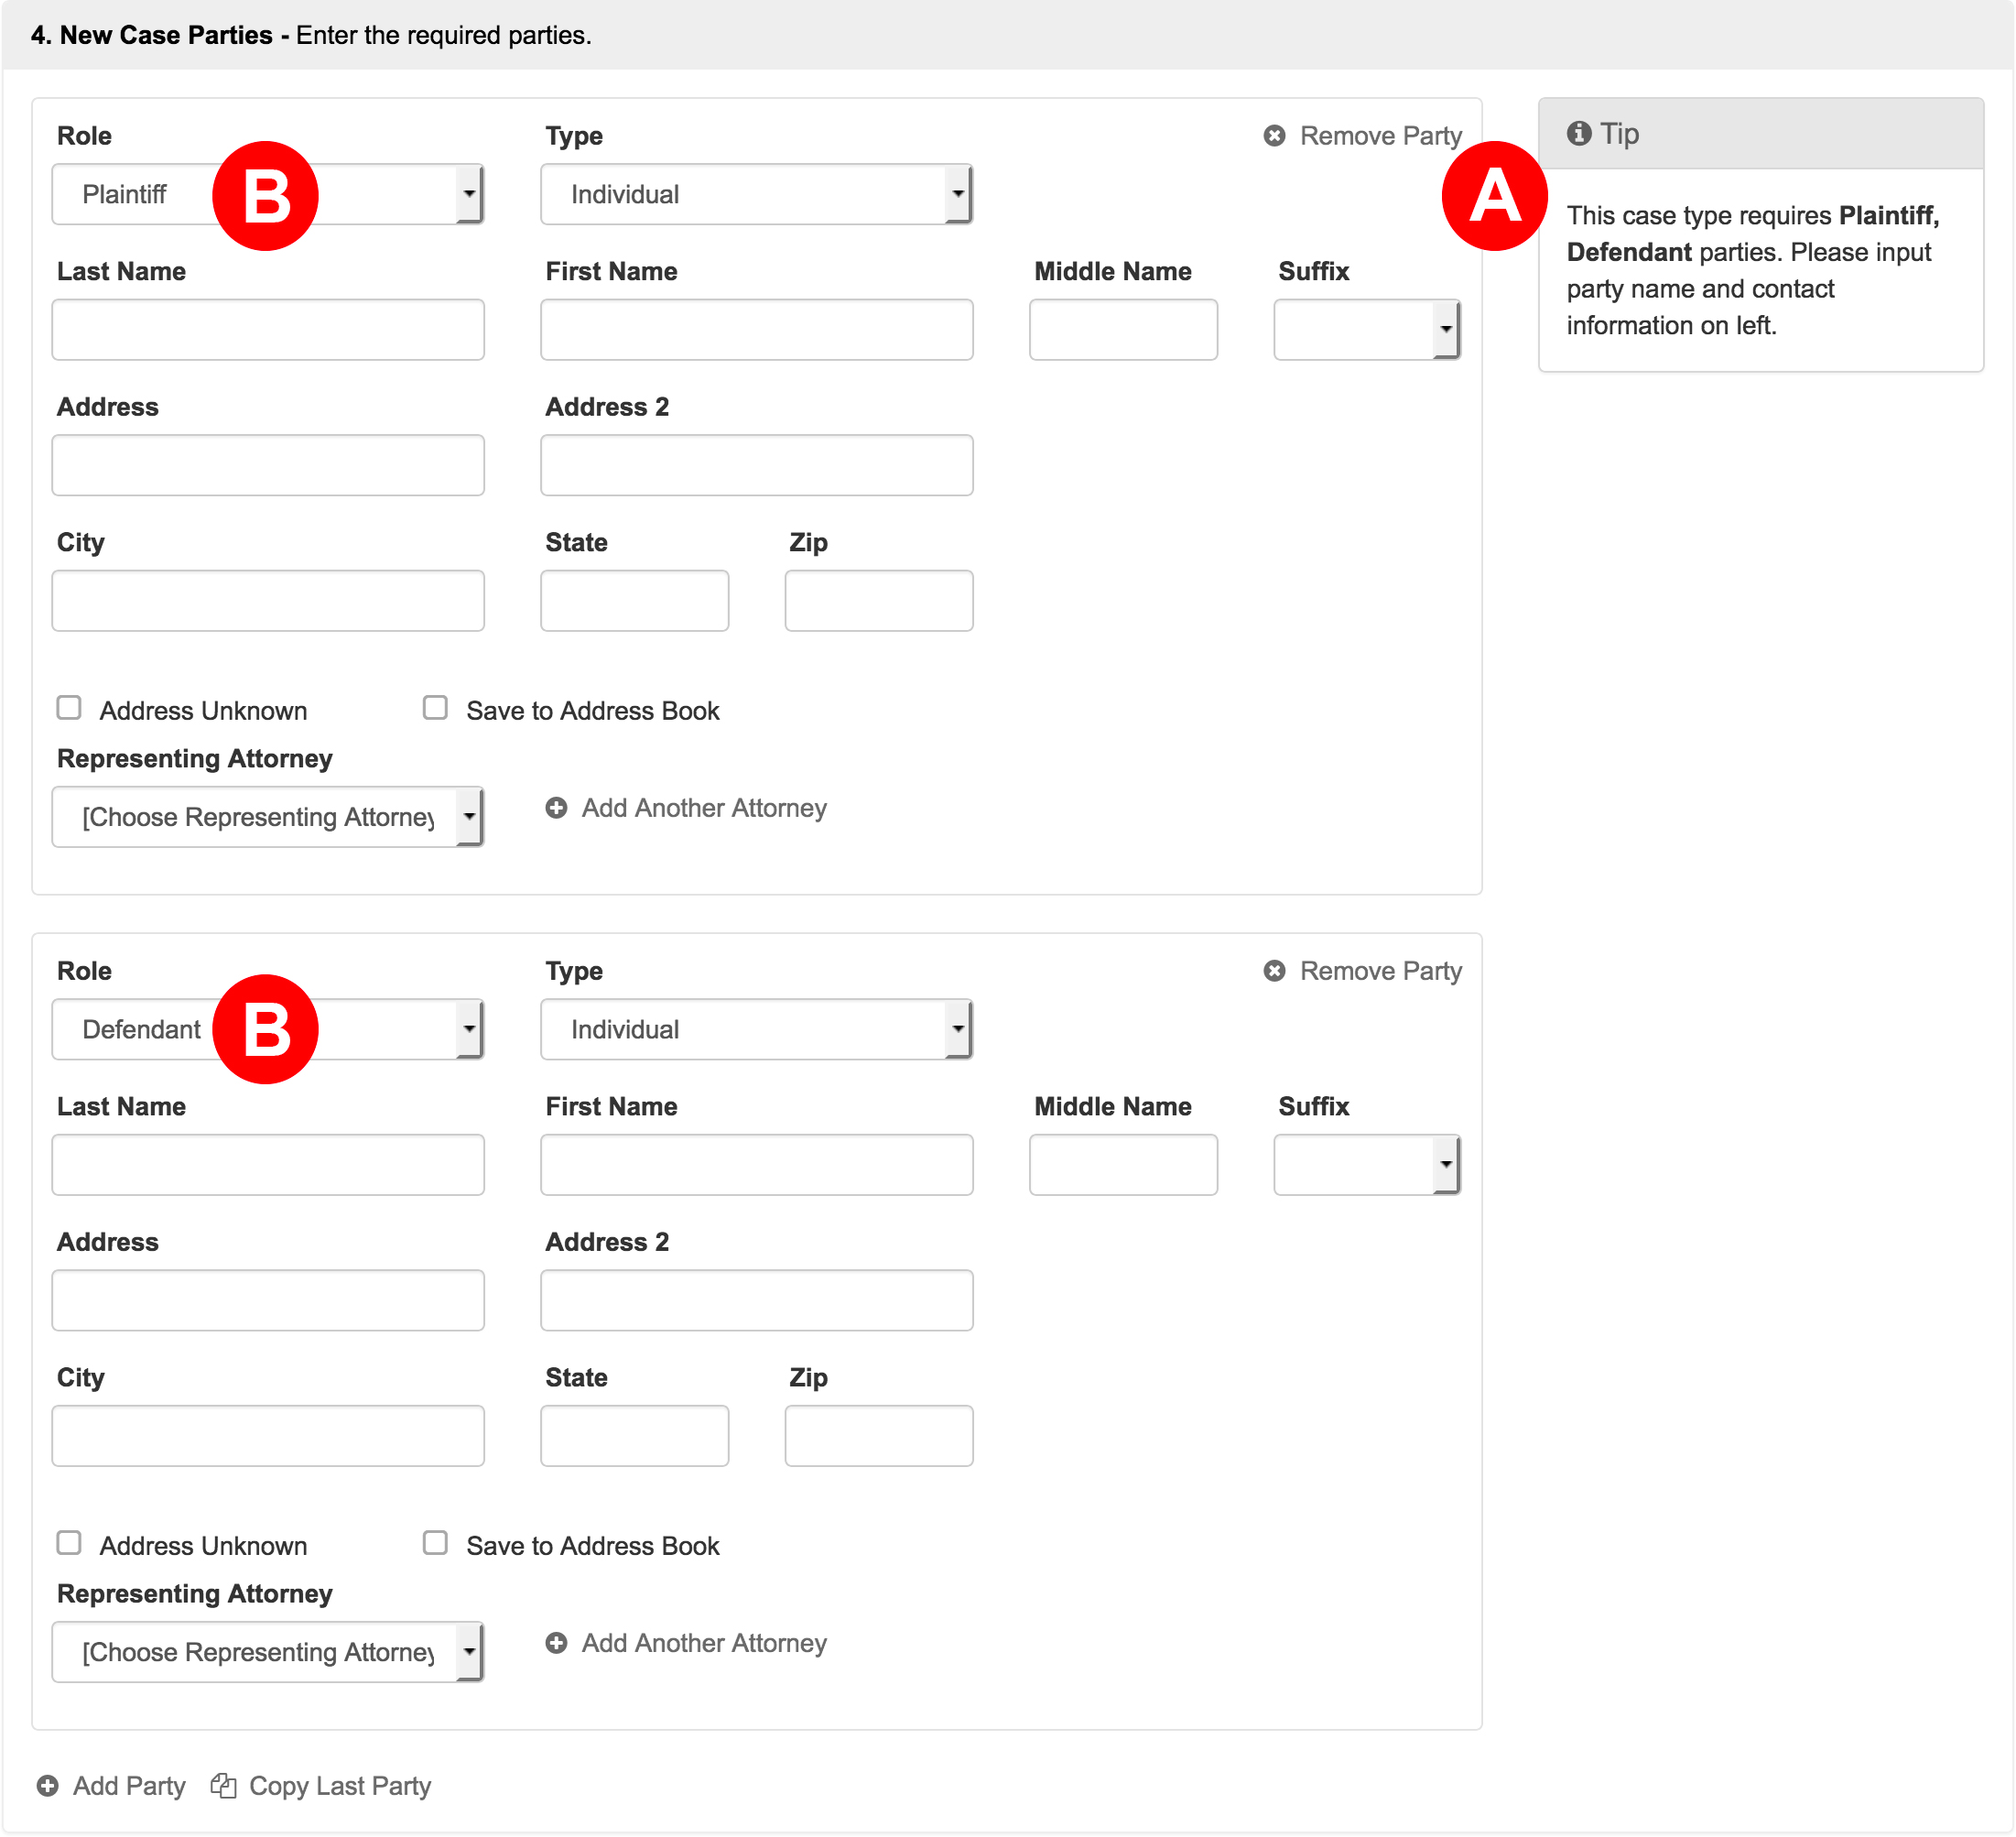
4. New Case Parties – Enter the required parties.

- Most states will alert filers to the roles they need defined via this Tip box.
- Some states will auto-populate the required roles in the parties section itself.
When filling out this section, you may select Representing Attorneys from the menu, or click the Add Another Attorney link to add them.
If you do not know your party’s address, you may click the Address Unknown checkbox.
You may add more parties by clicking the Add Party link at the bottom of this section, but you must still have the court’s required roles in order to file.
5. Filing Party – Choose the party or parties you are filing on behalf of.

6. Service Contacts – Add service contacts to your filing to perform electronic service.

- eServe – To manage electronic service (e-service) recipients, simply select or deselect any listed contacts. If no contacts are currently available or if you need to add more, click the “Add Service Contact” link (Letter D). Please note that you can only edit or delete service contacts that you have personally added.
If you do not want the opposing party (or any party) to view a document marked as “Confidential,” do not use electronic service for those parties. Electronically serving a party unequivocally means that you, the filer, are giving them access to that document. - Mail Service – Filers have the option to send accepted documents to any service contact via Certified and First Class Mail.
- Name – You can add or edit a Mail Service address. However, the address will only be visible if a Mail Service type is selected in the preceding column; otherwise, only the contact’s name will be displayed.
- Add Service Contact – Filers may click the”Add Service Contact” link to add new contacts to a filing.
- Return Address – Make sure the “Return Address” listed is correct for any returned Mail Service.
Learn More About Service Contacts Learn More About Mail Service
7. Filing Fees – Select a payment method to pay estimated fees.

Fees Breakdown
Court Fees/Court Document Fees – If any of your Document Types have fees associated with them, the first row(s) will list the document with its associated fees. If this amount looks incorrect, please select a different document type from the options above.
EFM Convenience Fee – Some court’s E-Filing Managers (EFM) charge a convenience fee for each accepted filing. This fee covers the cost of the EFM software, which the court uses to receive, review, and process electronic filings submitted through any integrated e-filing service provider.
Court Transaction Fee – Some courts charge filers a transaction fee for each accepted filing.
Provider Service Fee – This is the fee your chosen provider (EFSP) charges for each accepted filing. Please refer to your EFSP for more information regarding their fees.
Payment Service Fee – The Payment Processor charges a fee of approximately 3% when a credit card is used, or a flat fee of up to $1 for an ACH payment.
Sales Tax – Sales tax may appear in the fees section because some state governments classify the e-filing service itself as a taxable transaction or service, requiring the payment processor to collect and remit the applicable state sales tax on the charge for filing.
Confirm Fee Calculation
Click “Confirm Fee Calculation” to view the estimated filing fees. These fees are automatically determined by the court based on the case type, selected document type(s), and any additional services you’ve chosen. If the calculated fees appear incorrect, double-check and adjust the case type, document type(s), or additional services as needed.
Waivers on a Case
If your party you are filing on behalf of has an approved fee waiver, or if you are including a fee waiver request with this filing, you must select a waiver payment type to “pay” the listed fees. Please note that the option to select a waiver payment type is not available in all courts. You can find more information via the button below.
Learn More About Waiver Payment Accounts8. Review & Submit – Finalize your filing, review, and submit.

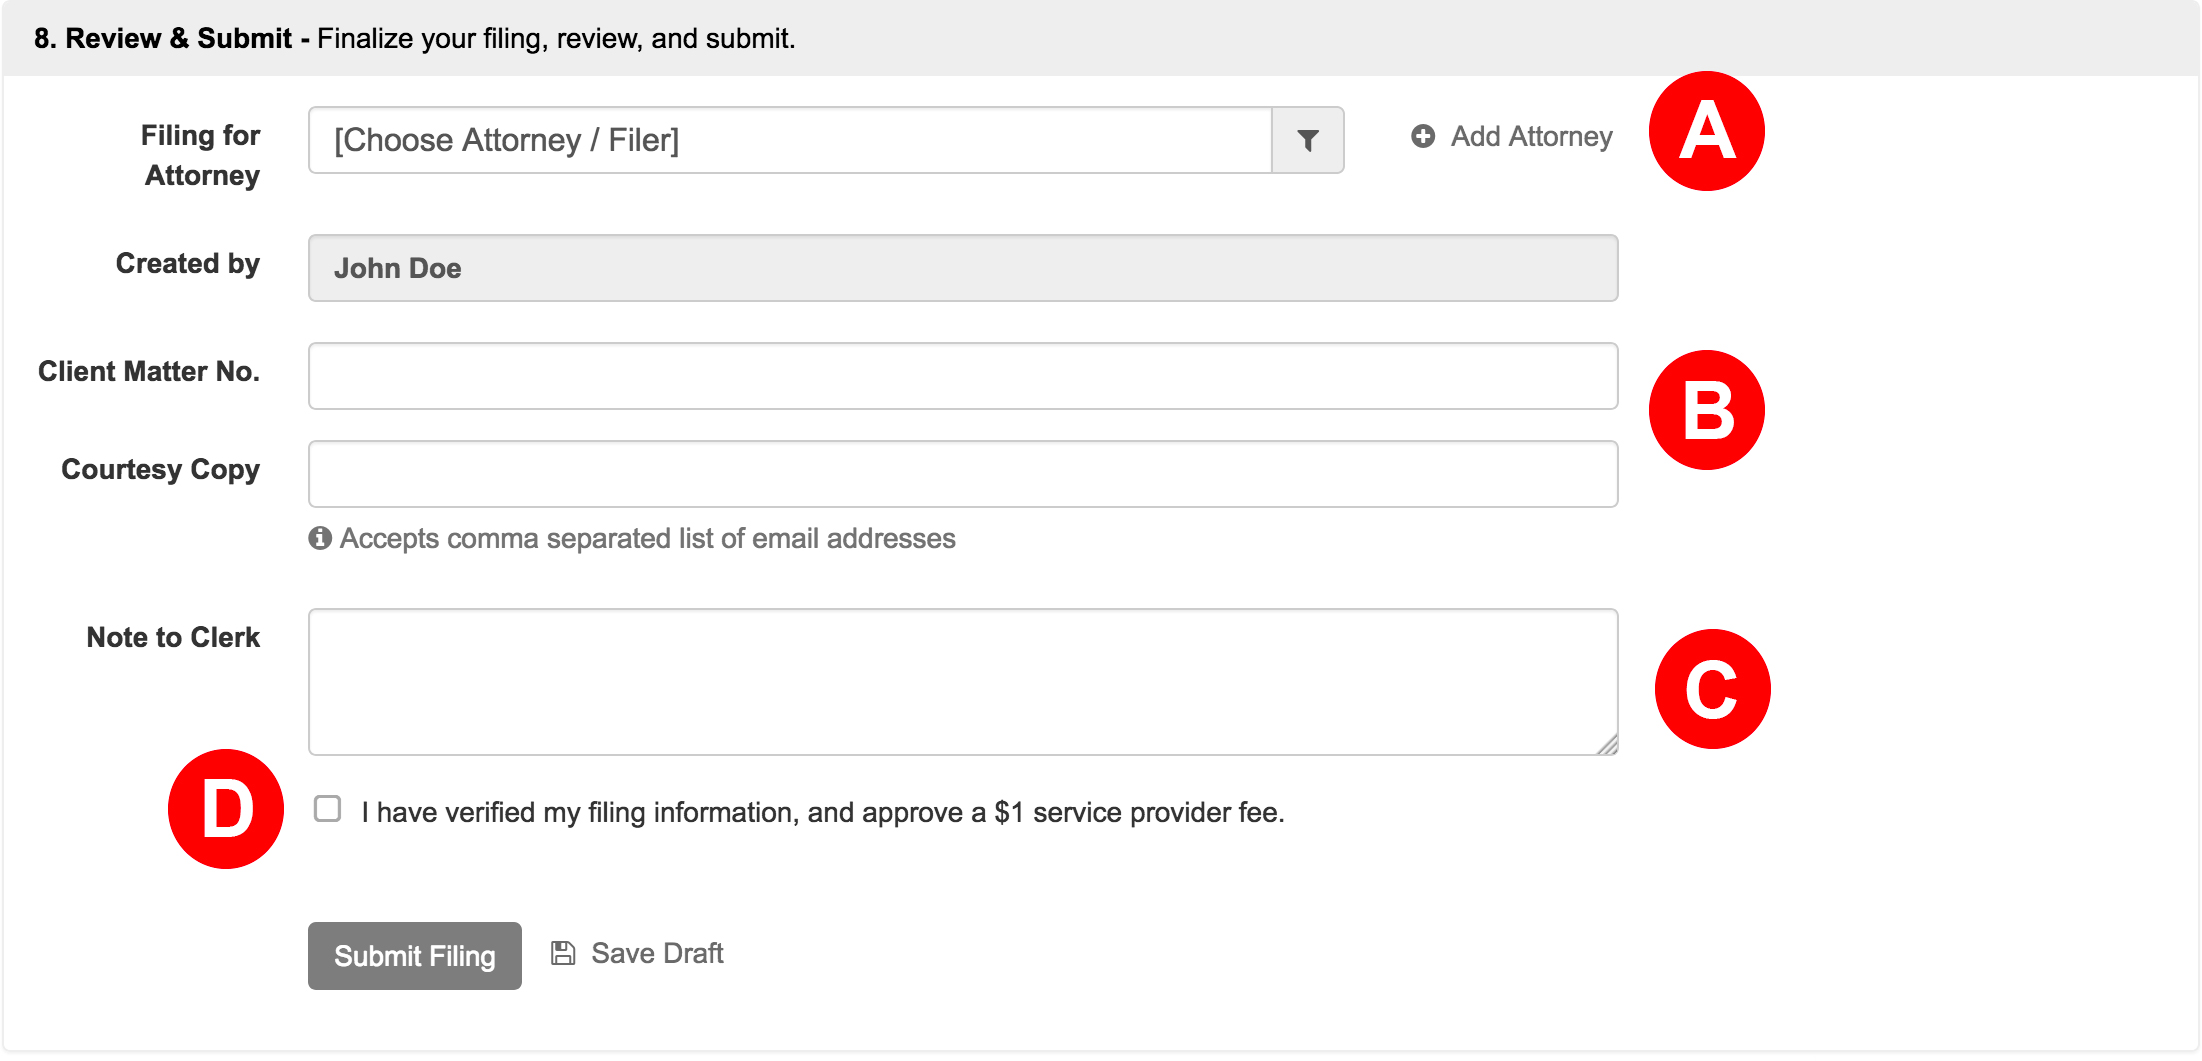
- If you are Filing for an Attorney select them from the menu or click the Add Attorney link.
- Enter your firm’s Client Matter Number in the specified field if applicable. To send courtesy copies of this filing via email to clients or other relevant parties, enter their email address(es) in the designated area. Please be aware that these email recipients are not considered officially served, and both this feature and the Client Matter Number are for your internal records only.
- If your court has the option to leave the clerk a memo, enter any sort of note here in the Note to Clerk box.
- Review your entire filing for accuracy, Then check the box to acknowledge you have verified your filing information.
Submit Your Filing
Click the “Submit Filing” button to send your filing directly to the Court Clerk for review. After all documents are successfully sent, the Court will provide an envelope number and the exact date and time they received your complete submission. This receipt timestamp will be the official file stamp for your accepted documents. For filings submitted after 11:59 PM on weekdays, or anytime on weekends or Court Holidays, the official file stamp will be the next Court business day.
After submitting, your filing status will show as “Pending” on the Filing Status Screen. You can return to this screen anytime to monitor its progress, along with your other filings. Court review times vary, typically ranging from a minute to a full business day. Extended pending times might suggest a court backlog. For status inquiries, contacting the Court directly with your filing’s Envelope Number is the best approach.
Pre-authorization of Fees
Please be aware that upon submitting your filing, the court will initiate a pre-authorization on your payment card for the estimated filing fees. This pre-authorization is only finalized when your filing is accepted. If the court rejects your submission, the pre-authorization will not be settled and should automatically be removed from your account within 3 to 10 business days following the rejection date. The exact timeframe for this removal depends on your bank’s policies.
Learn More About the Pre-Authorization of Fees Learn More About Pre-Authorizations and Debit Cards